
Step-by-step instructions on how to set up email notifications with ControlByWeb products.
ControlByWeb products can generate email messages, notifying the end user that an event or condition has just occurred. This feature must be correctly set up before any email notifications can be sent. The following steps will walk you through how to set up email notifications using an SMTP (Simple Mail Transfer Protocol) Server, and where to find your necessary network information.
- Step 1: Validate your network settings
- Step 2: Enter your SMTP server information
- Step 3: Set up desired email information
Step 1: Validate your network settings
- Access your ControlByWeb product at your device IP Address, followed by /setup.html (example: 192.168.1.2/setup.html).
- Navigate to the Network settings. This step will vary a bit depending on your device:
- 4 Series: Under General Settings, select the Network
- X-600M: Under Network, select the Ethernet
- XW Series: Select the Wi-Fi Networks
- Now ensure that the DNS settings are correct. You can use a Public DNS server such as Google’s below:
(Preferred: 8.8.8.8. Alternate: 8.8.4.4.)
Enter this into the “Preferred DNS Server” and “Alternate DNS Server” fields.
If you are required to or prefer to use your network DNS settings, you can find them using the command prompt. Using Windows, open the command prompt, and type ipconfig/all, then look for the DNS server. Enter this into both the preferred and alternate DNS server fields or the alternate server will be located after a comma (ex. 192.168.1.1, 8.8.4.4).
If you are using a Mac, go to System Preferences > Network.
SMTP Server settings. The values for these fields can be found by searching online for your email provider’s SMTP server settings.
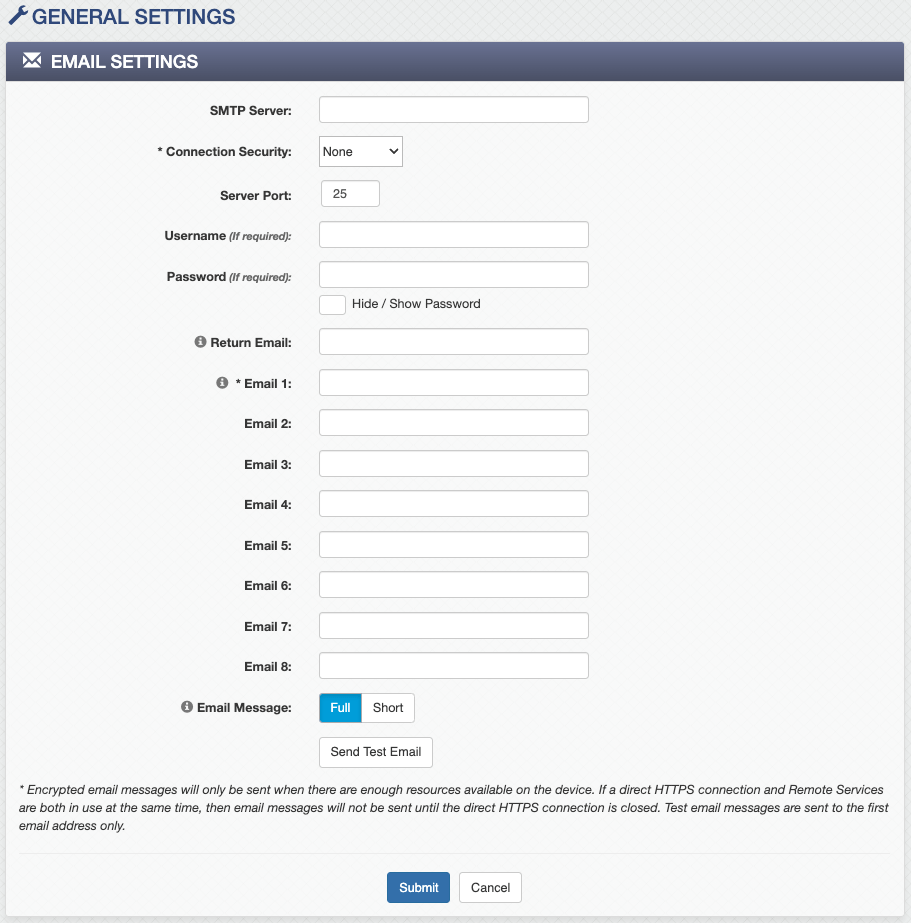
Step 2: Enter your SMTP server information
- Next, navigate to the Email settings. You will enter the SMTP server information on this page. This step will vary a bit depending on your device:
- 4 Series: Under General Settings, select the Email.
- X-600M: Under Network, select Advanced Network, then Email.
- XW Series: Select the Wi-Fi Networks.
- Yahoo: smtp.mail.yahoo.com
- Gmail: smtp.gmail.com
- Outlook: smtp-mail.outlook.com
- If a Username/Password is required by the SMTP server, enter them into the “Username” and “Password” fields. You can obtain this information from your ISP or Network Administrator.
Step 3: Set up desired email information
- In the “Return Email” field, you will typically want to enter the same email used in the “Username” field. If anyone replies to an email notification, that reply will be sent here. Your SMTP server may also require a return email for spam protection.
- Depending on your device, the available number of email recipients will be anywhere from 3 to 10. Enter the recipient’s email addresses of your choice into the “Email” fields.
- Once you have successfully submitted the settings, you can send a test email to ensure your settings are correct.
Troubleshooting
If you do not receive an email, you can check the system log file in order to get some insight as to what might be happening. To access the system log type the following address:
http://IP_Adddress/syslog.txt
Replace “IP_Address” with the current IP address assigned to the X-301.
Example: http://192.168.1.2/syslog.txt
At the bottom of the log file, you might see one of the following errors:
05/10/2011 10:06:32 92.0F, –.–, 4.5V EMAIL: Failed DNS Lookup.
05/10/2011 10:10:02 92.0F, –.–, 4.5V EMAIL: Bad Username.
05/10/2011 10:12:00 92.0F, –.–, 4.5V EMAIL: Bad Password.
05/10/2011 10:13:15 92.0F, –.–, 4.5V EMAIL: Authentication Required.
05/10/2011 10:17:42 92.0F, –.–, 4.5V EMAIL: No Response.
If you get one of these errors, go back through and double-check your settings, starting with the errors mentioned in your syslog file. After following the above steps, and your email still doesn’t work, please feel free to send our support staff an email.
Note: The syslog.txt command is not supported by the following models: WebRelay™, WebRelay Quad™, XW-110 Plus™, XW-110™, XW-111™, XW-112™
Once you’ve received the test email you can configure your relays and inputs to send emails based on certain conditions or changes of any I/O state.
More Information
For instruction on how to set up email for specific ControlByWeb devices, please refer to the user’s manual for your device available on our website.
For email troubleshooting tips, please see our Email Troubleshooting FAQ